Savory Chicken
|
|
Savory Chicken
Enchiladas |
|
Enchilada literally means "in chili." Cooked meat or cheese is wrapped in tortillas (either corn or small flour tortillas though I prefer the corn) and covered with an enchilada sauce made with chilies. The dish is usually topped with cheese and baked until the cheese is well melted. Enchilada sauce is of two basic varieties; red and green chili enchilada sauce. You can make your own sauce or select from some excellent prepared sauces in different pungencies. |
|
Preparation Time : 45 minutes Serves 6 to 8 persons |
Life Experience Recipe
|
Ingredients:
|
|
| Procedures:
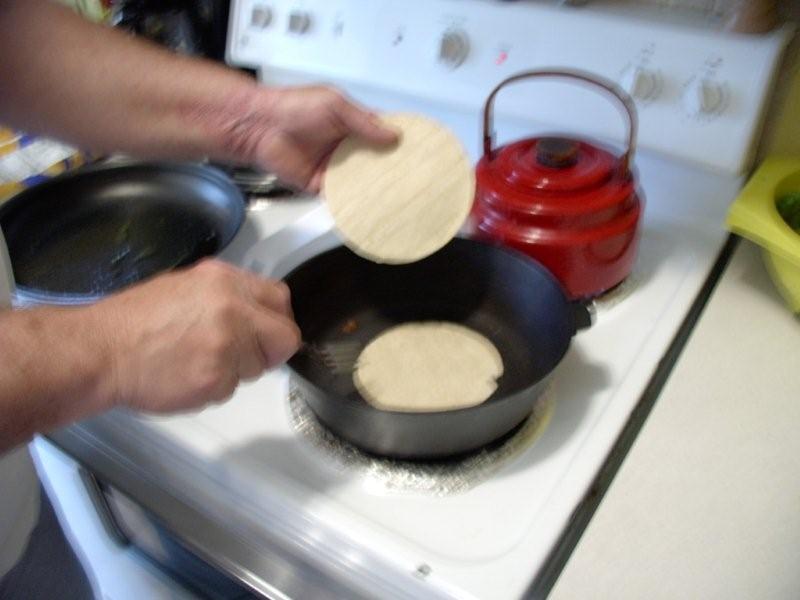
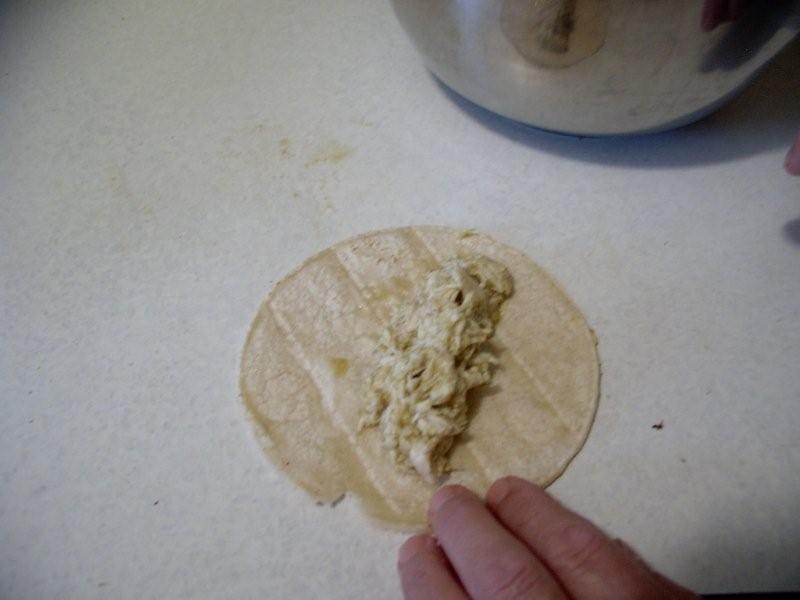
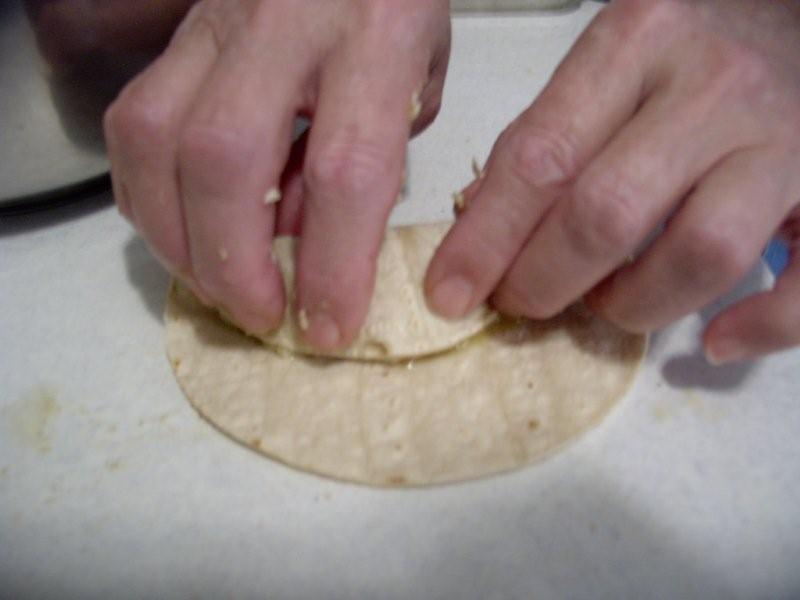
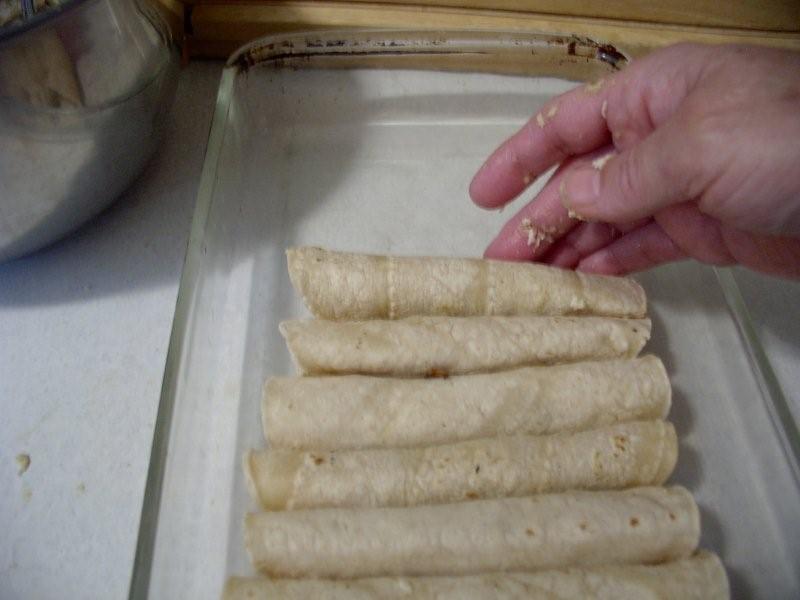
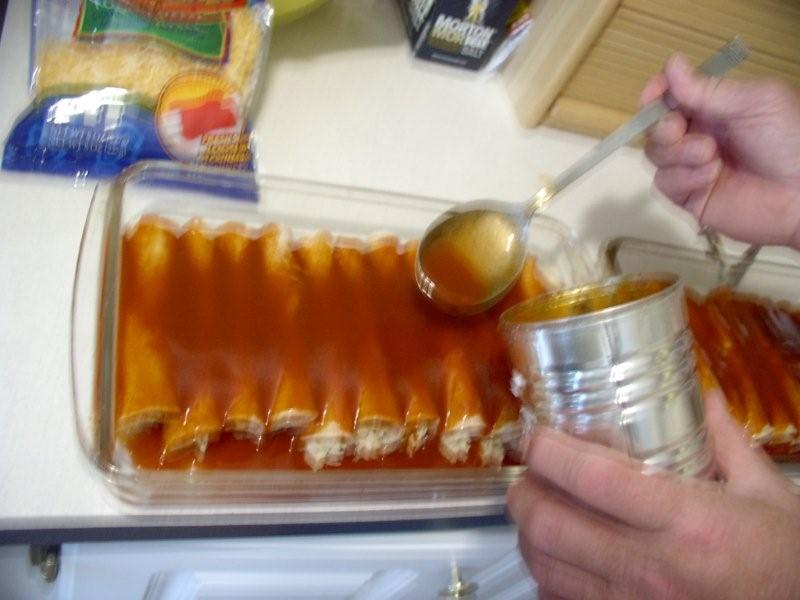
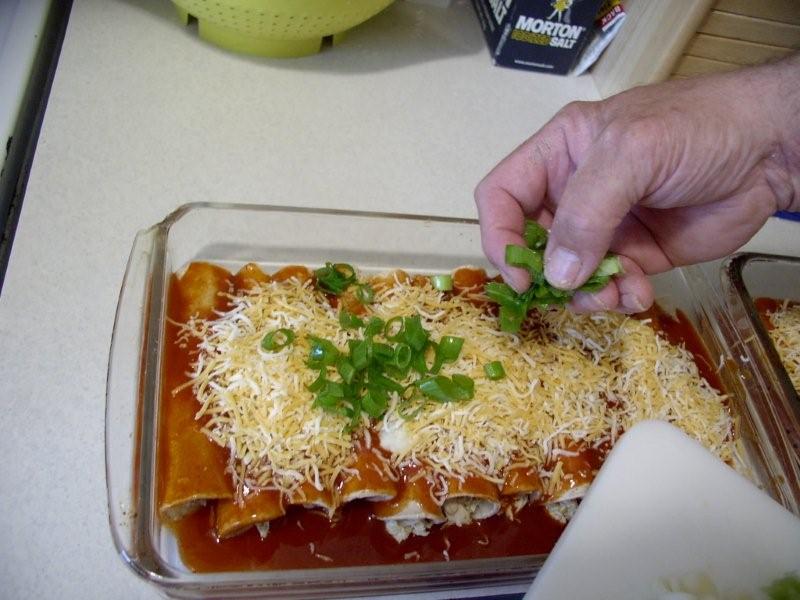
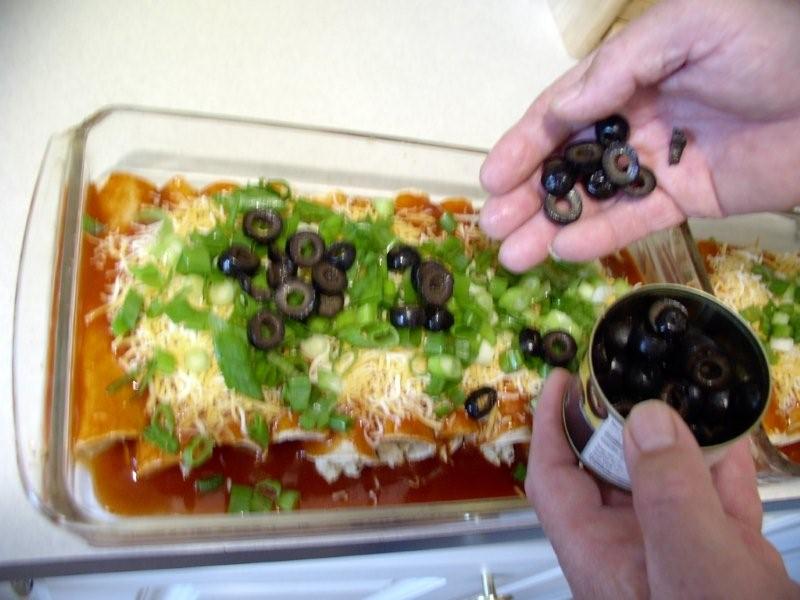
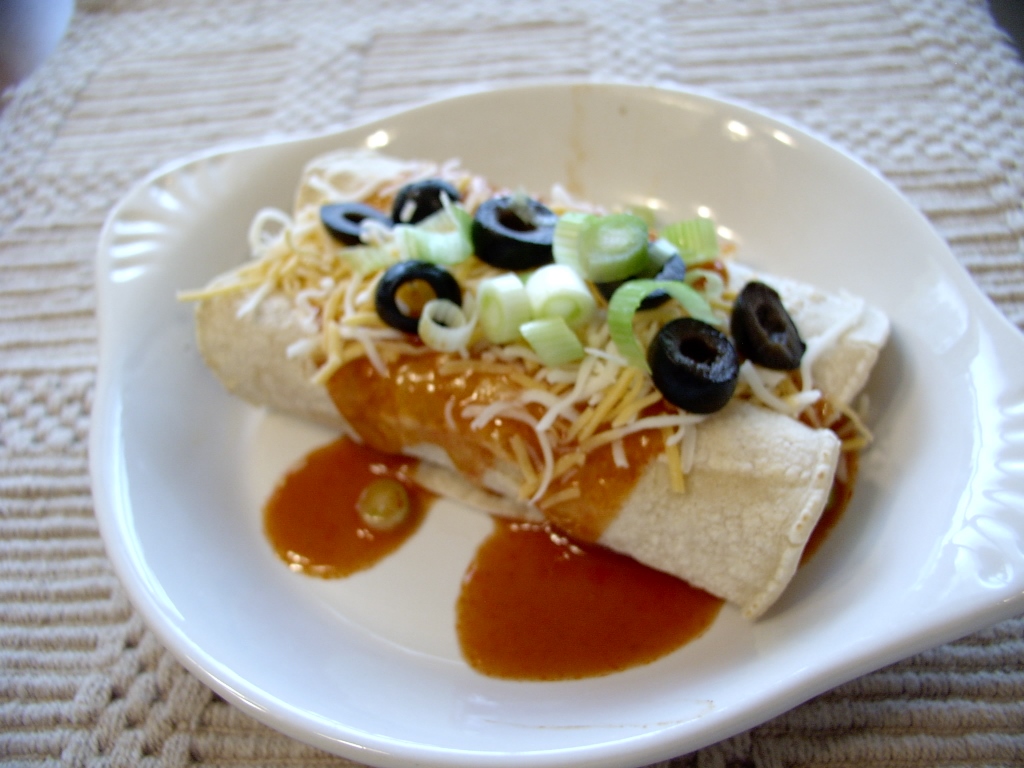
Put the beef or the chicken in a saucepan and add just enough water to cover. Add onions, salt and pepper. You may have to add a bit of water from time to time to keep the meat covered. Cover and cook over low heat and simmer until meat is "pull-apart" tender. Remove the meat and onions from the liquid and allow to cool. Add the diced green chilies. The broth may be reserved for other purposes. When the meat has cooled, use fork or fingers to pull meat apart into shreds. The forks work well but most of the time I just use my fingers its quicker and easier. Place shredded meat and onions in a bowl. Add 1 cup of the shredded cheese and ½ to ¾ cup of the enchilada sauce and toss to coat. Divide meat mixture into 12 portions. Roll each portion in a warmed tortilla (if they are not warmed, they will split when rolled). Place snugly, seam side down, in a 6- by 10- by 2-inch baking dish. Some will fit across and some along the side of the dish. The finished enchiladas serve easily from a glass or Teflon coated pan. If the pan is bare metal, you may want to lightly grease the pan before filling with the enchiladas. Cover with the remaining enchilada sauce. Sprinkle with remaining cheese. Bake at 375° for 15 to 20 minutes or until cheese is melted and the enchiladas heated through. You can garnish with sliced green onions, sliced olives or a dab of guacamole, if you like. Enchilada sauces are usually, but not always, based on the Anaheim or New Mexico type chile. Picked early, the chiles are green and called a green chile. These are most often available as fresh produce or canned. When ripe, the chilies turns red and are called, not surprisingly, red chilies. These are most often available dried and must be reconstituted before use. The green chiles are a mild chile and are often combined with tomatillos in enchilada sauces. The dried red chiles are a bit hotter but need some additional cayenne or other chiles to make a really hot sauce. There are many commercially prepared chile sauce mixes in the supermarket aisle or you can make your own red chile sauce or green chile sauce from many available recipes. It is easiest to warm each tortilla before you fill it with the meat mixture. A cast iron frying pan or griddle over medium heat works well. I have watched Latina ladies cook tortillas on griddles. They use their bare fingers to catch the edge of the tortilla and turn it over. After trying it, I decided that a fork or spatula spared my fingertips from the hot griddle. |

|