AirCore BBQ Ribs by Larry Andersen
Click to enlarge - Air Core BBQ ribs served with sides of macaroni and cheese and BBQ beans.

Air Core

Barbecued Ribs

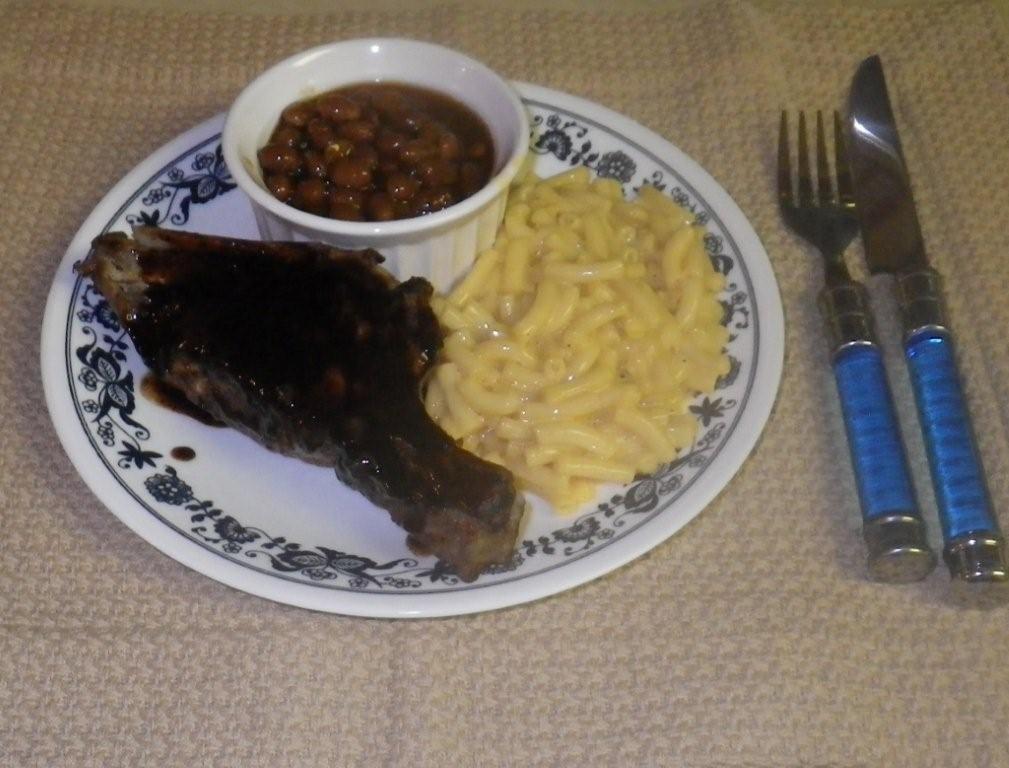
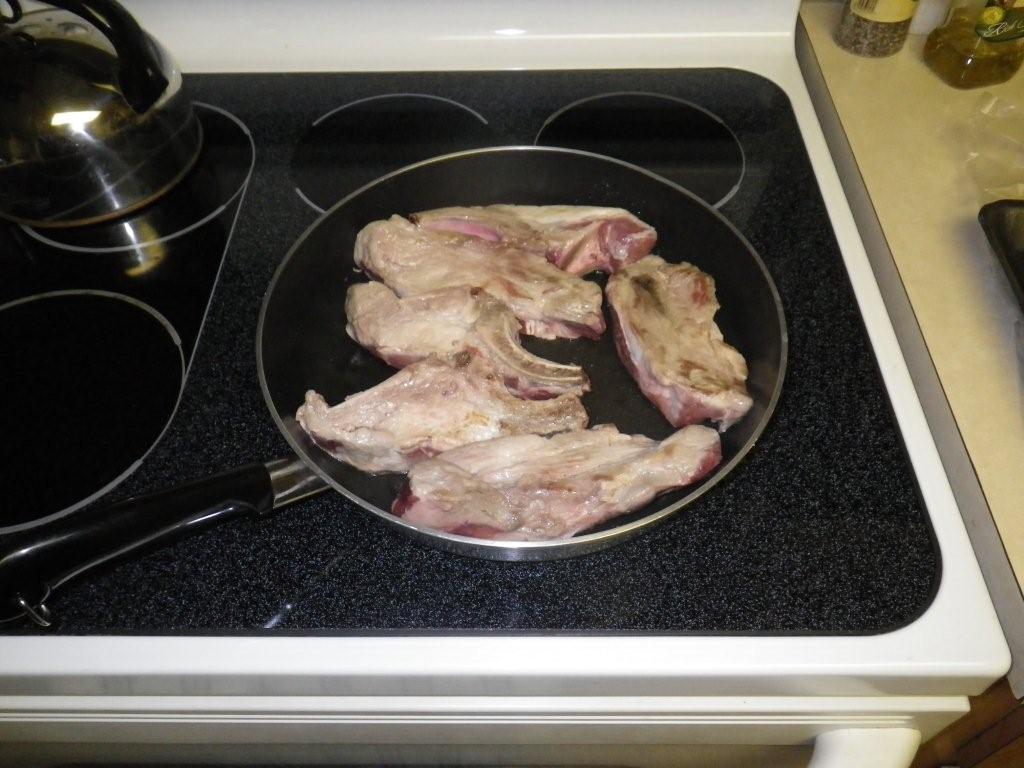
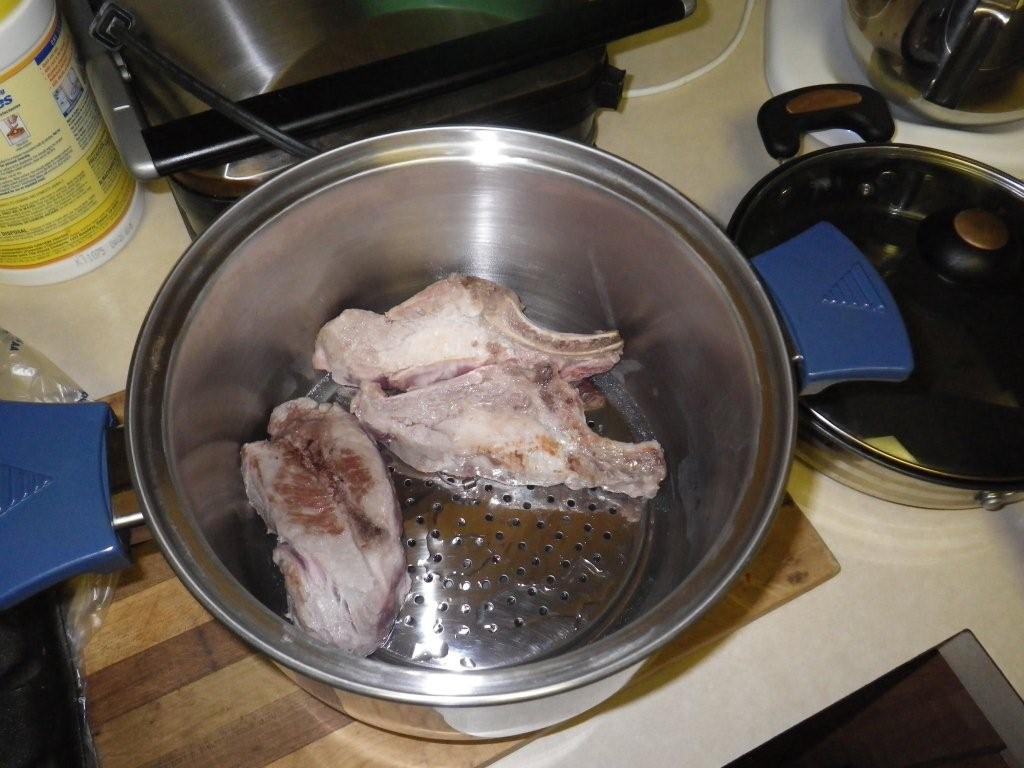
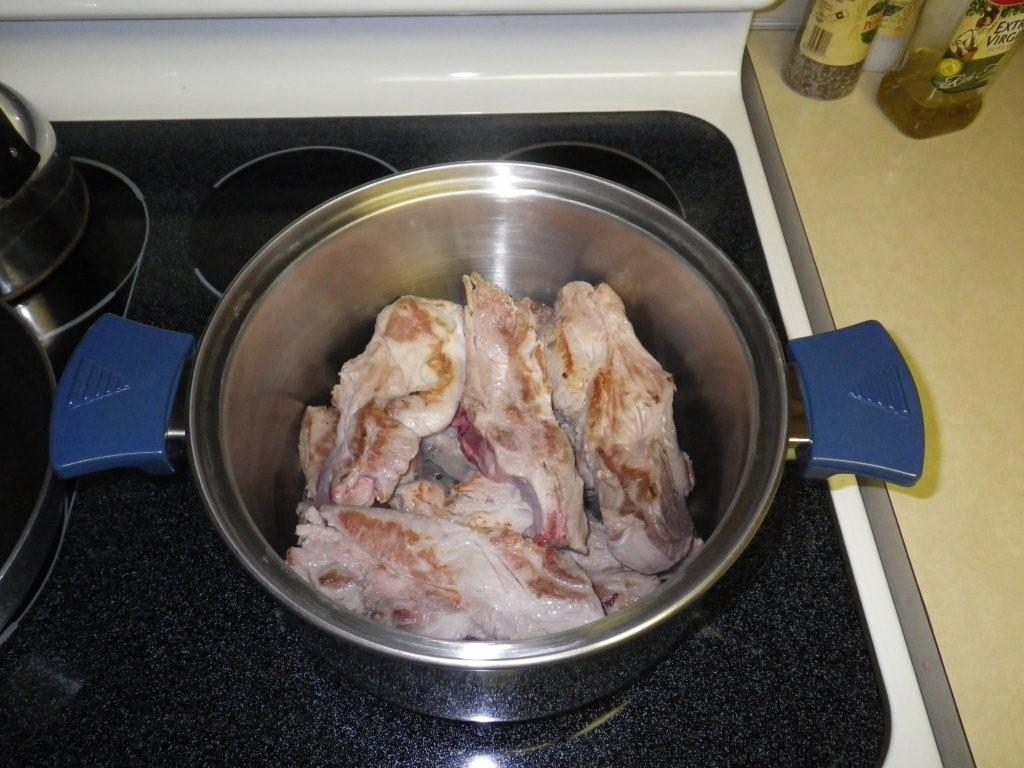
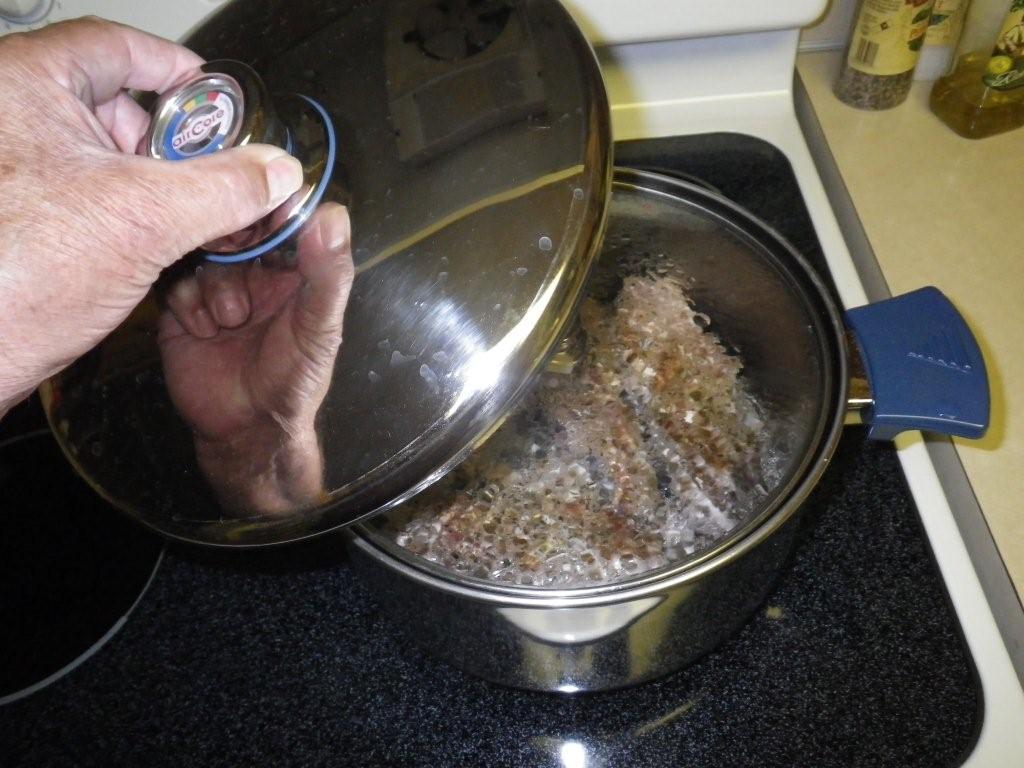
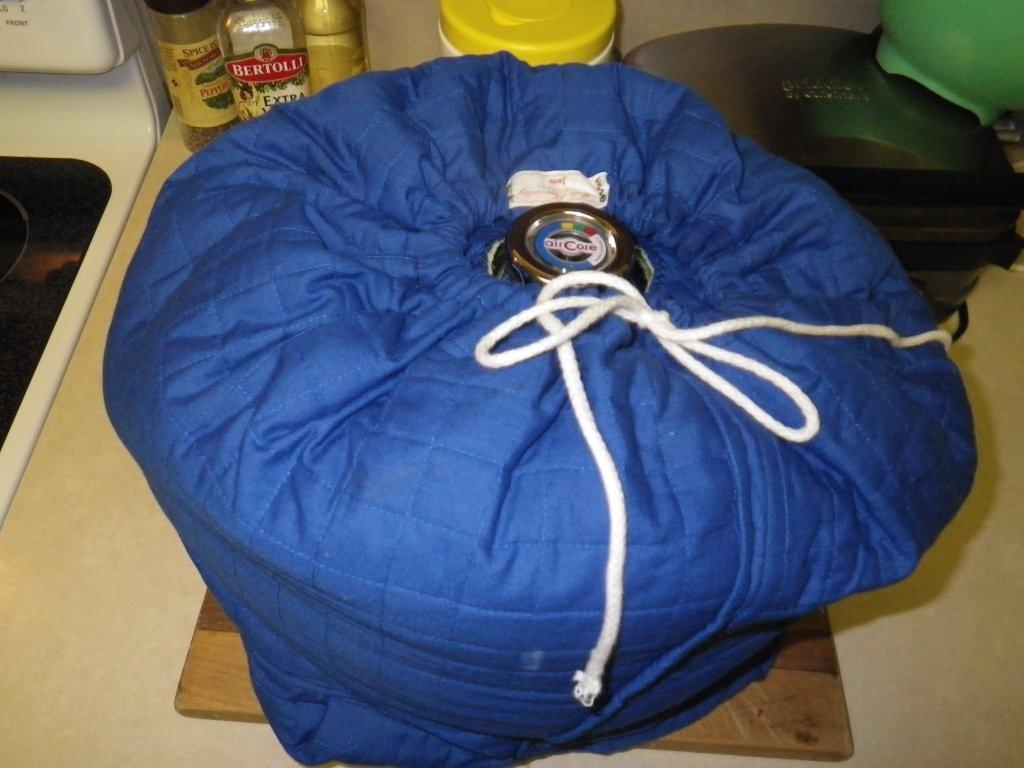
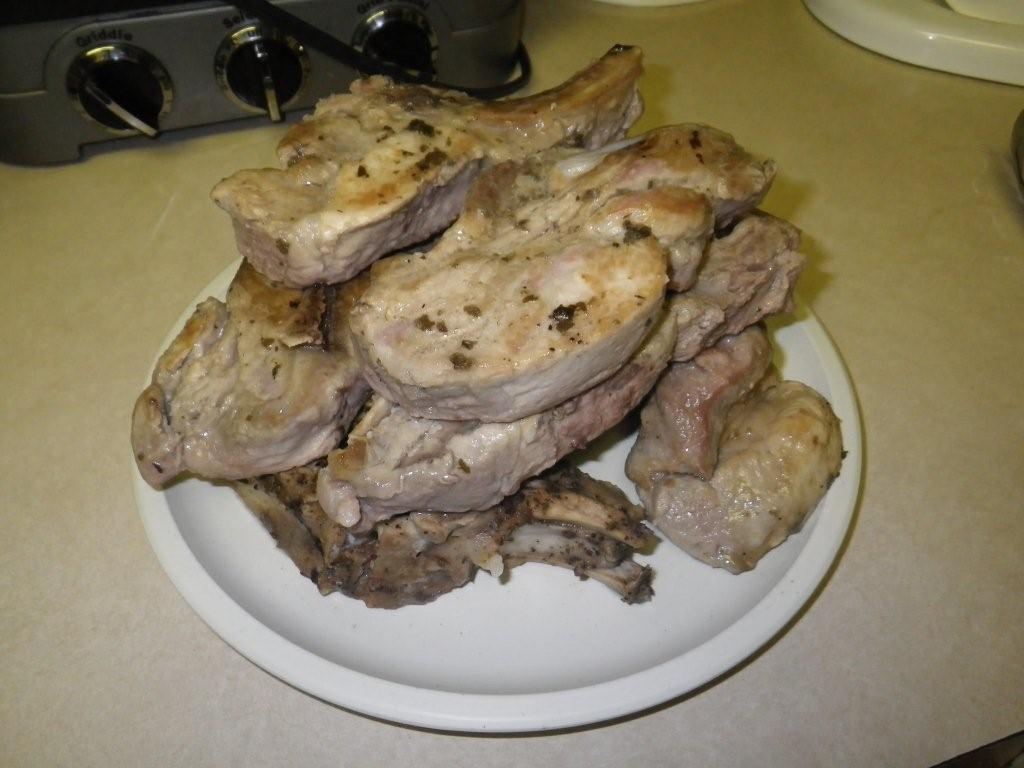
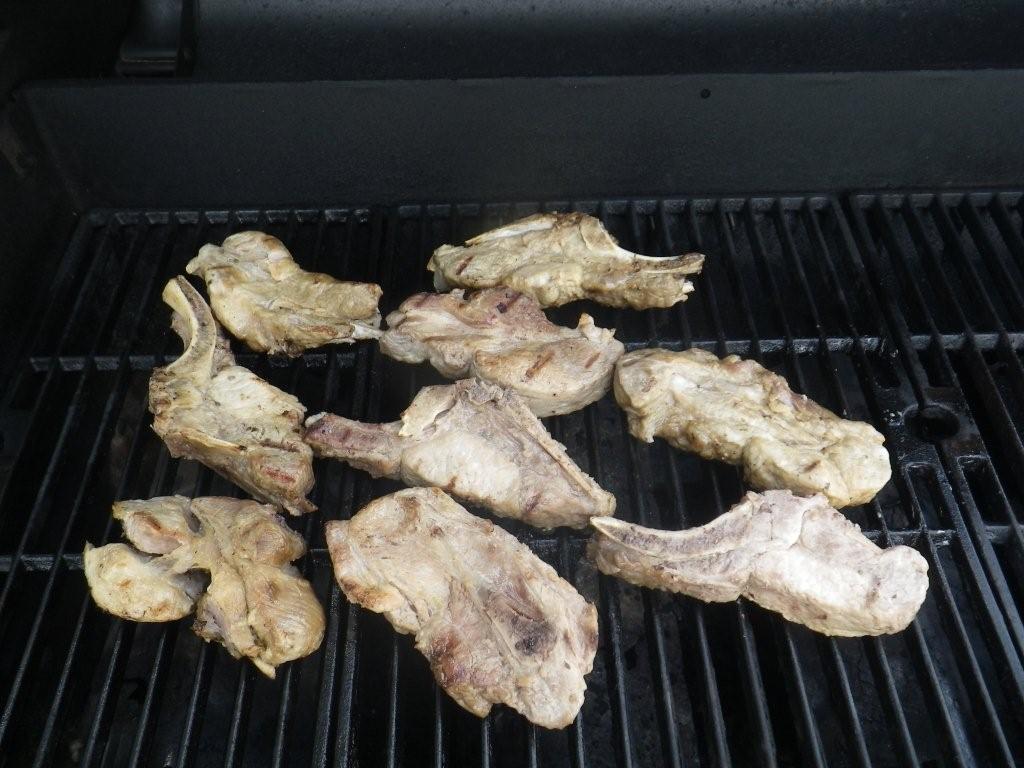
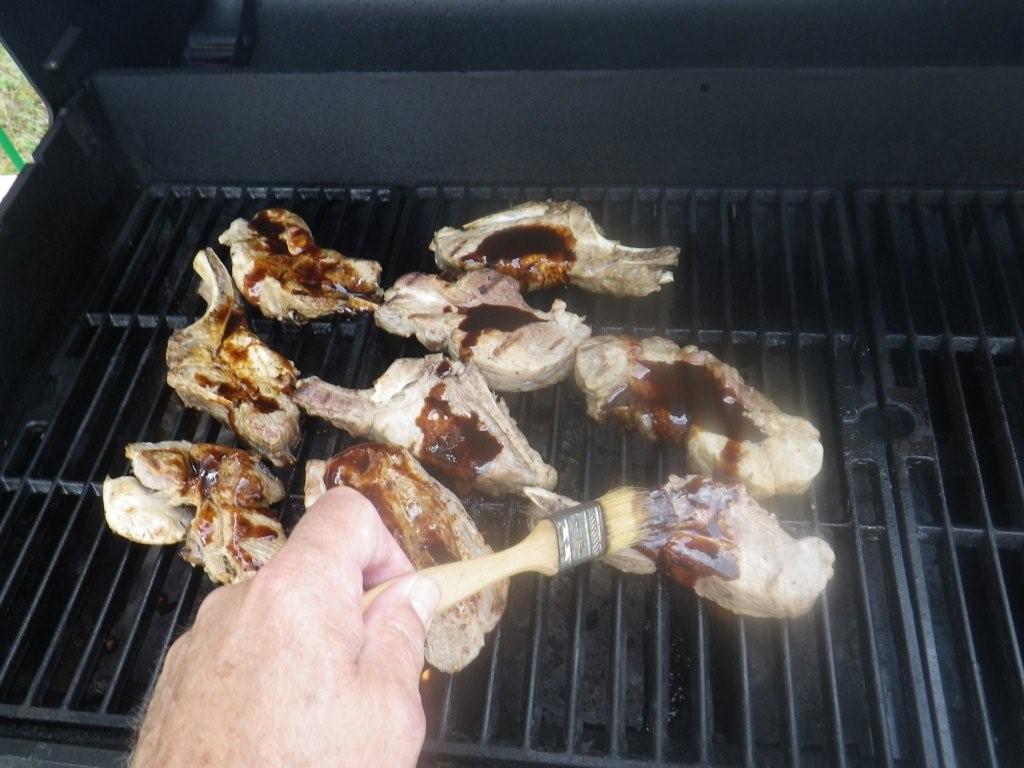
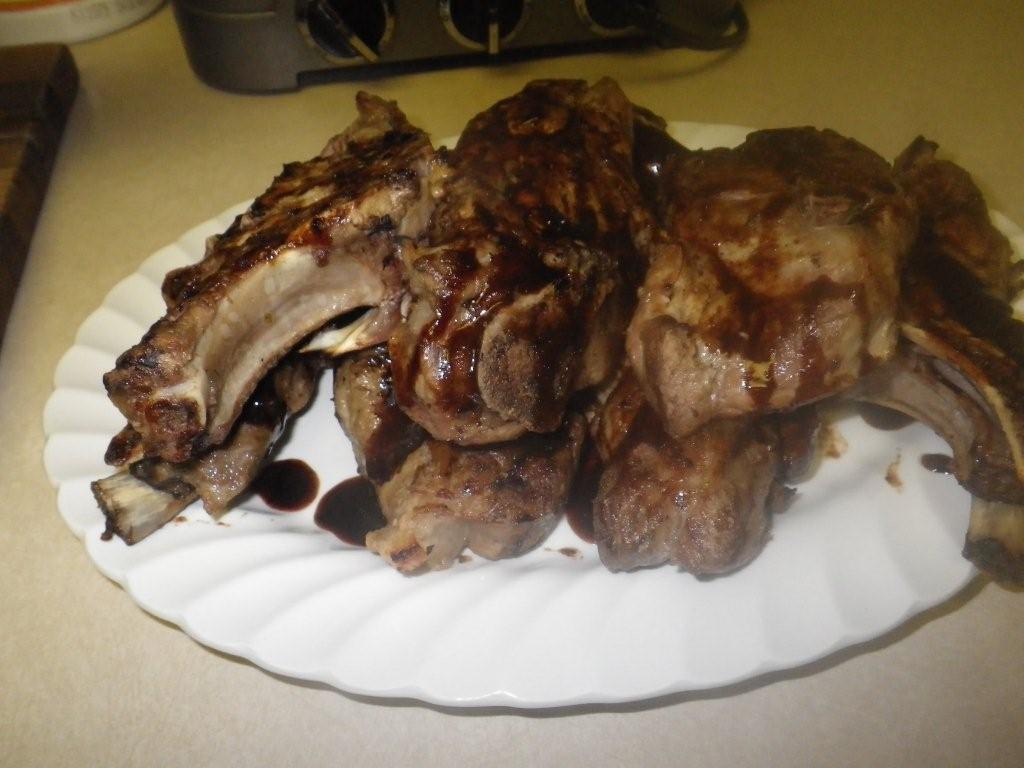
Barbecue is low and slow cooking. On the road there isn’t time to go slow on the barbecue grill. So, we start the ribs in the frying pan to add a little color and browning. Then the ribs go into the Dutch oven, elevated just above the water level. The water is heated until it boils, the heat reduced and the lids put in place to trap the steam. When the pot comes up to cooking level, the pot is place in the cozy to continue cooking, unattended, in a steam and then hot vapor atmosphere for the five hours. On arriving at our destination, all that is required is to fire up the grill and heat the ribs through while applying a coating of your favorite barbecue sauce.

The ribs are a small volume in the pot and as a result there is a smaller than usual amount of heat. Be careful not to let the heat indicator drop below the bottom of the green, usually that is just above the lowest safe recommended food handling temperature, 140°.

Here we have used pork loin ribs but the procedure works well with most other fatty ribs, beef or pork. Also, flat beer makes a flavor adding substitute for the braising water. Enjoy!

Preparation: 20 minutes prep, 5 hours self cooking Life Experience Recipe
Makes 4 plus pounds of ribs
Ingredients:
  • 4 to 5 pounds pork loin country-style ribs, or your favorite rib selection
  • Oregano
  • Olive oil for browning ribs
  • Seasoned salt
  • Ground black pepper
  • Garlic powder
  • 1 10-ounce bottle your favorite BBQ sauce
Procedure
  1. Preheat your frying pan, add a little olive oil. Lay the ribs in a single layer on the bottom of the pan. You will have to do the ribs in batches. Cook over medium high heat just until ribs start to brown. Turn the ribs over and brown other side. Remove from pan and brown next batch.
  2. Place screen on the bottom of the AirCore large Dutch oven. Add water to just cover the screen. Sprinkle the browned ribs with the seasoned salt, pepper and garlic powder. Arrange first layer in pot allowing space between ribs.

    Click to enlarge - Browning the ribs in a spash of olive oil. Click to enlarge - Layering the ribs over the cooking liquid.

  3. Arrange second layer bridging across first layer of ribs to allow free circulation. Heat over medium low heat until liquid boils. Reduce heat to just simmer. Cover with glass and dome lid. Continue heating until indicator reaches the top of the red mark, about 10 minutes. Remove from heat. Carryover heat will make the needle coast past the top of the red.

    Click to enlarge - Stacking last layer spanning the other ribs to allow for circulation.. Click to enlarge - Liquid boiling, reduce heat and cover with both lids.

  4. Place Dutch oven in the cozy, add the dickey and cinch up the cozy. The ribs will now continue to self-cook, braising in the hot vapor. This is a small load in a big pot and the heat inside is limited. The needle will be back to the top of the red in about one and one half hours. The needle will reach the top of the green in an additional one hour and fifteen minutes. An additional three hours will elapse before the needle reaches the bottom of the green. The ribs will be about 144°, just above the safe food handling lower limit.

    Click to enlarge - AirCore Dutch oven in its cozy. Click to enlarge - The ribs after five hours self cooking in the Dutch oven.

  5. Handle carefully as the meat is quite tender and separates easily from the bone. Preheat your barbecue grill. Grill just long enough to add some color and grill marks and to heat through. Turn the ribs and brown the other side.

    Click to enlarge - Grilling ribs to heat through and to add color and grill marks. Click to enlarge - Basting the ribs with barbecue sauce.

  6. Brush with barbecue sauce and heat until sauce bubble. Remove to serving platter. Serve with your favorite accompaniments.

    Click to enlarge - A platter of ribs ready to serve. Click to enlarge - It all makes for a fine meal whe served with your favorite accompanyments.

Return to Cookbook Contents Page
Latest revision done September 2011